Alright, let’s talk about Horizon. Not the actual horizon, of course. Those look great in the game. Especially with a Stormbird against a digital sunset. We discuss the mechanical aspects of Horizon Zero Dawn and Forbidden West. We’re focusing on those magnificent, terrifying machines. The ones that constantly target Aloy.
Thunderjaw Domestication? (A Slight Exaggeration)
First question: Can you override a Thunderjaw? The answer is: yes, eventually. You do not simply stroll out of Mother’s Embrace and start mind-controlling Thunderjaws. That would be anticlimactic. Imagine starting the game with a Thunderjaw as your first mount.
The game requires you to earn your machine-whispering skills. Aloy’s journey involves growth as a character and her ability to handle dangerous situations. Remember that little device on Aloy’s ear? The Focus? It’s for scanning machines and finding datapoints, but also crucial for overriding them. However, upgrades are needed.
You need software updates for complex programs. In-game, these updates come as Cauldron overrides. As Aloy explores Cauldrons, she downloads override codes. These upgrades allow her to control more powerful machines. Yes, this leads to overriding apex predators: Thunderjaws, Stormbirds, Behemoths, and Rockbreakers. These are not ordinary Grazers.
Now, let’s discuss a Thunderjaw with a reputation: Redmaw. This beast is part of a quest. You may wonder, “Can I just override Redmaw?” Technically, yes, but overriding Redmaw doesn’t complete the quest. The game won’t let you skip the glorious combat required to defeat it. You must still defeat it. Overriding provides a temporary advantage before you attack.
Let’s backtrack to early game and answer: How do you unlock Grazer override? Grazers are perfect for early-game practice. Good news! Unlocking Grazer overrides occurs early in the main storyline. Simply complete the main quest “Womb of the Mountain.” Once done, you’re capable of taming Grazers. It unlocks ability for all Phi-tier machines, including Grazers.
Switching topics, there’s a question about “Horizon Omega.” This confuses it with another game, No Man’s Sky. The “Horizon Omega” ship is from No Man’s Sky as a pre-order bonus. To claim it, go to Options, find Extras, and select “Redeem Bonus Content.” Missing pre-order? Don’t worry! The internet has save editors for such items. But back to Horizon: no “Horizon Omega” exists in these games.
Now, how do you tame a Grazer in Horizon Zero Dawn? “Taming” is a strong word. It’s more like hacking their systems to think we are allies. Approach a Grazer stealthily (or boldly). Get close enough and see the override prompt. Hold the override button (usually Triangle), and voila! You have a friendly Grazer. They’ll assist in battles against machines or bandits.
Jumping to Horizon Forbidden West: can you override any machine? The answer is nuanced. The overriding system is refined and slightly complicated. Completing Cauldrons remains crucial but doesn’t grant full override capability for every machine type within that Cauldron. Some machines will only be partially overridden.
This means you’ve unlocked the base override, but need more steps to fully control them outside. These steps involve interacting with specific components hinted at by prompts and Focus scans. The game challenges you: “You’ve learned basics; now prove you’re a true machine master!” Cauldrons remain your gateway but add extra exploration and puzzle-solving for each machine type.
A question arises: Can you override multiple machines in Horizon Zero Dawn? Yes, but with a catch. You can turn the tide of battle into chaos with multiple overridden machines. However, you can only maintain one override at a time. Think of your Focus capacity like a single Wi-Fi connection; you can switch between machines but only connect actively to one.
Once you override another machine, the previous one is deactivated. There’s a cooldown period needed for the Focus so you can’t chain-override quickly. However, you can use Corruption Arrows. They induce “corruption” on machines, causing chaos all around them, even among their kind. With Corruption Arrows, an unlimited number of machines can be corrupted simultaneously.
Thunderjaw Takedown 101: From Zero to Hero (or at least, not Zero Health)
You’ve mastered overriding Grazers now! Congratulations! It’s a gateway skill! But facing real challenges means taking on apex machines like the terrifying Thunderjaw. It leads the charge in the “machines that make you question everything” category.
This robotic T-Rex with disc launchers and laser cannons can be intimidating. Let’s explore the Thunderjaw combat. We will focus on its weaknesses and how to defeat it without getting shredded.
The million-dollar question: What is the Thunderjaw’s weakness? Every machine in Horizon has a weakness. It’s a fundamental part of the game design. Finding and using these weaknesses is crucial for survival, especially against a Thunderjaw. The standard Thunderjaw variant has primary weaknesses in Purgewater and Acid. Purgewater works exceptionally well. Hitting them with it weakens their armor. This makes them more vulnerable to damage. Acid inflicts long-term corrosion on their armor, causing damage and making them easier to dismantle. If you face an Apex Thunderjaw, things change a bit. Apex Thunderjaws are tougher and more aggressive. Their main elemental weakness is also Acid. So, load up the Acid Arrows and Purgewater Bombs. You’ll need them.
Now that you know their weaknesses, how do you beat a Thunderjaw easily? “Easily” is subjective when dealing with a machine that can crush you effortlessly. Still, certain strategies can make the fight less daunting. One effective tactic involves setting traps. Specifically, use explosive traps. Thunderjaws may be large and powerful, but they lack agility. They charge directly at you, making them predictable. Use this to your advantage. Set up explosive traps in their path and lure the Thunderjaw into them. Boom! Initial damage, and you’re off to a great start to chip away at their massive health bar. But traps are just the beginning. The real damage comes from targeted strikes on their components.
The key to defeating a Thunderjaw is to remove its armor and components. For this task, Tearblast arrows are essential. These arrows excel at stripping armor and detaching components. Focus on targeting the Thunderjaw’s weapons first. Aim directly at the Disc Launcher on its back. Removing the Disc Launcher not only eliminates a lethal attack but also gives you a powerful weapon to fight back. Once the Disc Launcher is out of the way, focus on its cannons, armor plates, and weak spots. The more components you detach, the more vulnerable the Thunderjaw becomes. It’s a systematic disassembly that turns a terrifying machine into mere scrap.
Now, what is the best weapon for Thunderjaw combat? There isn’t one definitive “best” weapon. Effectiveness varies based on playstyle and resources. However, some weapons excel against a Thunderjaw. The Shadow Sharpshot Bow stands out. Its Tear Precision arrows are ideal for tackling components. Plus, its regular Precision Arrows deal significant damage to weak points after stripping the armor. It’s reliable for accurate, targeted strikes. Another valuable weapon is the Lodge Ropecaster. Why should you use a Ropecaster? Because immobilizing a Thunderjaw is crucial. The Ropecaster allows you to bind the Thunderjaw. This halts its movements and attacks temporarily. You gain a chance to inflict heavy damage or reposition yourself. Pairing the Shadow Sharpshot Bow for component removal with the Lodge Ropecaster for crowd control makes for a potent Thunderjaw-slaying combo.
Offense is important, but you need defense too. Now, what is the best armor against a Thunderjaw? You will face a lot of projectile damage from a Thunderjaw. Its disc launchers and cannons are fierce. Armor that focuses on projectile defense is crucial. The Oseram Arrowbreaker Heavy armor fits this need perfectly. It excels against all projectile weapons. This armor is useful against not just Thunderjaws but also other machines like Ravagers and Stalkers, as well as pesky human foes with bows. The Oseram Arrowbreaker Heavy armor is a solid choice that boosts your survivability in the face of Thunderjaws and other projectile-heavy enemies. Not flashy, but effective in keeping you alive as you take down that robotic T-Rex.
You wouldn’t approach a Thunderjaw fight without preparation, right? So, what level should you be to fight a Thunderjaw? Thunderjaws are not easy targets for early-game players. They are designed as tough encounters for mid-to-late-game characters. The game classifies the Thunderjaw as a Combat Level 30 machine. This indicates when you should consider fighting them. Attempting to battle a Thunderjaw at lower levels is possible but frustrating and likely brief. You will probably be under-leveled, under-equipped, and lacking vital skills. It’s advised to wait until you reach around level 30 or higher, with decent gear and combat skills for a smoother experience.
Now let’s talk numbers. Specifically, how much HP does a Thunderjaw have? Knowing an enemy’s health can help you monitor your progress. Thunderjaws are tough creatures. They have approximately 6,500 HP. That’s a lot of health, even against strong weapons. Their high HP emphasizes using traps, exploiting weaknesses, and focusing on component removal to maximize damage efficiently. Simply chipping away at its armor with basic arrows will take ages.
Once you’re ready for a Thunderjaw hunt, you must know where to find them. Where can you find Apex Thunderjaws? Apex variants are rarer than regular Thunderjaws, so finding them can feel like a treasure hunt. Thunderjaws can be found in multiple regions of the map. Some places where they appear include Valleymeet, the Sundom, the Cut (from the Frozen Wilds DLC), No Man’s Land, Clan Lands, and the Burning Shores (in Forbidden West). Apex Thunderjaws spawn in similar areas but are less frequent and sometimes depend on your game progress or specific missions. For guaranteed Thunderjaw encounters, head to Cauldron ZETA. This Cauldron serves as a production site for Thunderjaws. You won’t find Apex Thunderjaws in Cauldrons directly, but completing Cauldron ZETA helps familiarize you with their combat and leads you to spawn points for Apex variants in the open world.
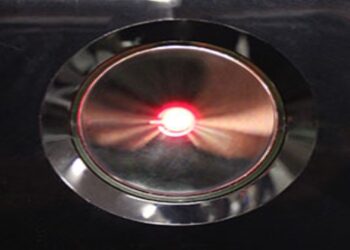
Now for something anatomical. One striking (and vulnerable) feature of a Thunderjaw is its heart. You might wonder, how do you expose a Thunderjaw heart? The heart glows orange on its side but is covered by a metal plating. To expose it, you must remove that plating. Tearblast arrows are your tool for this task. Aim your Tearblast arrows at the metal plating on the Thunderjaw’s side. Continuously fire until you remove the plating exposing its glowing heart. Once revealed, it becomes a prime target for high-damage attacks. Precision Arrows, hardpoint arrows, or even well-aimed bombs directed at the heart can cause significant damage, hastening the Thunderjaw’s defeat. exploit this weakness effectively.
Finally, once you’ve defeated a Thunderjaw, you’ll want to loot the remains. Naturally, you’re after valuable components like the Thunderjaw Heart. So, how do you get a Thunderjaw heart? Good news: obtaining a Thunderjaw Heart is simple: loot the Thunderjaw after defeating it.
Thunderjaw Hearts always drop from Thunderjaws. You do not need to target or detach the heart to loot it. Defeating the Thunderjaw rewards you with this item. The heart is visible but cannot be removed with Tear damage during combat. You obtain it after the battle.
Another important part is the Thunderjaw Lens. How do you get a Thunderjaw lens? Similar to the Heart, Thunderjaw Lenses are looted from Thunderjaws after defeating them. They drop less reliably than the Heart, yet they are valuable for crafting and trading. Grab them when you defeat a Thunderjaw.
Next, we have the Thunderjaw Tail. This large metallic appendage stands out. How do you get a Thunderjaw tail? To acquire it, you must detach the tail before the Thunderjaw is destroyed. This requires targeting the tail with Tear damage during battle. Tearblast arrows work well for this task. Focus on the tail until it falls off. If you destroy the Thunderjaw first, you cannot loot the Tail. Prioritize tail detachment during combat. It’s also amusing that you can get a Thunderjaw Tail from Untalla in exchange for a Black Box.
Consider this combat tactic: Can you tie down a Thunderjaw? Yes! The Shadow Ropecaster helps significantly in these fights. Using it to tie down a Thunderjaw is excellent for control and damage. Here’s a strategy: Use the Shadow Ropecaster to immobilize the Thunderjaw. Then, do elemental damage. Shoot a Freeze Canister underneath it with a Freeze Arrow. This causes an explosion and freezes the machine. While frozen, unleash heavy attacks. A good target is the Disc Launcher. If detached, unleash its ammo on the Thunderjaw. If it’s still alive, repeat: tie it down, freeze it, and shoot its weak points like the heart. Continue this until the metal beast is defeated. This immobilization, elemental damage, and targeted attacks make for effective Thunderjaw destruction.
Machine Overriding: Beyond Grazers and into the Robotic Zoo
We explored Thunderjaw combat and overriding. The world of Horizon is full of diverse machines. Let’s broaden our view and discuss machine overriding. We’ll examine which machines Aloy can charm (or hack) and those that cannot be tamed.
The main question is: Which machines can you override in Horizon Zero Dawn? Many! Horizon Zero Dawn features a great override system, controlling many machines. Machines you can override depend on the Cauldrons completed. Each Cauldron unlocks capabilities for specific machines, usually tied to its function. Complete Cauldrons like SIGMA, RHO, XI, and ZETA to unlock more machines. You begin with Grazers and Striders and progress to larger foes like Thunderjaws. The game reveals overrideable machines as you conquer these foundries.
An interesting twist: what about red-tinged machines? Can you override corrupted machines in Zero Dawn? No way. Corrupted machines behave differently. Infected by a program, they turn hostile. They cannot be overridden. Also, they are immune to Corruption Arrows. Attempting to override them leads to failure and possible death. Funny enough, non-corrupted machines attack corrupted ones on sight. Aloy’s Corruption Arrows induce temporary “enragement,” making the affected machine attack anything nearby. So, while you can’t control corrupted machines directly, you can use them against their own kind.
What about the tougher variations? Can you override Apex machines? In Horizon Forbidden West, the answer is also no. Apex machines are stronger versions of regular machines. They serve as tougher challenges and are not overrideable. The override system remains limited to non-Apex, non-Corrupted, and non-Daemonic machines. Overrides usually last only in a machine’s spawn area. Mountable machines become permanent mounts after overriding until you dismiss them.
Outside gameplay, let’s consider: “What Cannot be overridden?” This relates to programming concepts of method overriding. In programming, specifically object-oriented programming, method overriding involves a subclass offering a different implementation of a method defined in its superclass. However, static methods cannot be overridden. If a subclass defines a static method with the same signature, it hides the superclass’s method. This is distinct from method overriding. Though this isn’t directly linked to machine overriding in Horizon, it’s an intriguing tangent on “override.” In Horizon, “overriding” controls a machine’s programming, making it serve Aloy.
Returning to Horizon mechanics: Does override do anything? In programming annotations, like the @Override annotation in Java, its presence doesn’t change code execution. The purpose of @Override is signaling intended overrides from a superclass method. It serves documentation and error checking purposes. If you use @Override incorrectly, the compiler flags an error. This avoids method hiding or mistakes. Again, this concept isn’t directly about Horizon gameplay. In Horizon, “override” transforms enemy machines into allies and alters combat.
How long do machines stay overridden? In Horizon Zero Dawn, a standard machine override lasts two minutes. After this duration, the override wears off, and machines revert to hostile behavior. Certain skills extend this time. The Combat Override skill increases this duration by 50%, extending it to three minutes. Mountable machines have an exception. Once overridden, like a Strider or Charger, they remain overridden until you dismiss them.
No time limit exists. Mounts are your permanent metallic steeds. Other overridden machines act like temporary allies.
We discussed overriding multiple machines earlier. Let’s summarize: How many machines can you override at once in Horizon Zero Dawn? The limit is one at a time. You control only one actively overridden machine. If you try to override another, the first cancelation occurs. The Focus requires recharging after each override. This stops quick chaining of overrides. However, Corruption Arrows create broader chaos. You can control one machine, but use Corruption Arrows to make unlimited machines fight each other. It’s a trade-off: direct control over one versus chaotic influence on many.
Now, let’s look at specific machine types. Can I override a Fireclaw? Fireclaws are large, aggressive, bear-like machines from Frozen Wilds DLC. Yes, you can do this under one condition: you can override two Fireclaws in the “Out of the Forge” errand. This event is scripted into the errand. One Fireclaw is west, near Tramplers and Scorchers; another is east, near Aratak and two Fireclaws. Overriding in the errand is part of the quest and offers tactical gain. Outside this errand, Fireclaws are not overrideable. Enjoy commanding them during “Out of the Forge,” since this chance is brief.
Now, regarding mounts, Which machines are mountable in Horizon Forbidden West? Horizon Forbidden West adds more mountable machines than Zero Dawn. The base game mounts are: Charger, Bristleback, Clawstrider, Sunwing, and Waterwing. Each mount has strengths and weaknesses. Chargers and Bristlebacks are good for traveling and combat help. Clawstriders focus on combat, giving speed and attack skills. Sunwings enable aerial exploration. Waterwings allow for underwater exploration. Only the Clawstrider’s override is outside the main quest chain. Most overrides unlock through story progression.
Returning to Zero Dawn, What machines can you mount in Horizon Zero Dawn? The mountable machines list is smaller, yet offers variety. The mounts in Zero Dawn are: Strider, Charger, Broadhead, and Sawtooth (via special override in Frozen Wilds DLC). Striders and Chargers function as basic early-game mounts. They aid fast travel. Broadheads are larger and slower with better combat capability. Sawtooths can be mounted with a special override, but they focus more on combat than general use. Each mount has pros and cons. Some are fast, others tough, and some excel in combat.